1. Open your image in Imaris
2. Click on the blue “add new surfaces” button to start the surface creation

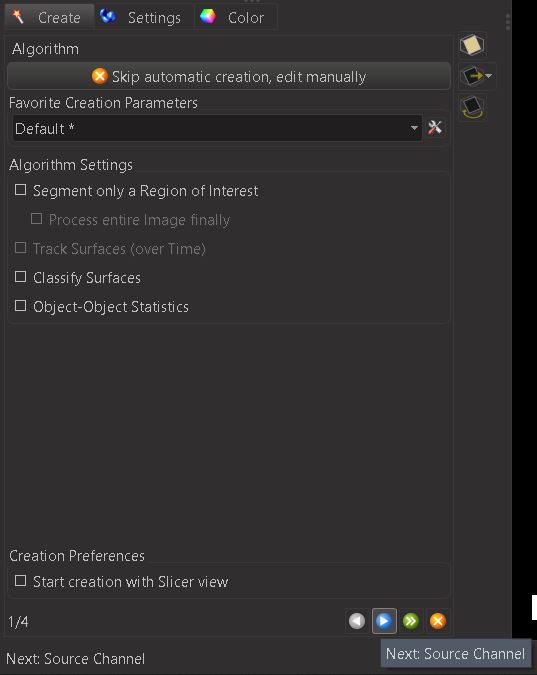
3. In the first step of the surface creation – leave the settings as they are, with all options unselected – and click on the blue arrow button to move on to step 2
4. In the second step you need to choose the channel you wish to create a surface over (here it is the red channel). Then decide if you wish to smooth the image. If you are detecting cells for counting or other objects where fine surface details are not important then choose some smoothing. If you are tracing a neuron where you need to see all the details then it is best to deselect smoothing (as shown). Finally, enable background subtraction in the thresholding option. This is almost always the best way to go.

5. For background subtraction to work properly you will need to provide the smallest diameter of the objects you are trying to create a surface over. If you are not sure of the size of your object, click on slice mode in the top menu – from slice view you can look at the slices of your image and by left clicking on the image it is possible to measure distances – here we have measured a dendrite as 0.78 wide. Copy the measured distance into the surface creator and go to the next step.

6. In step 3 Imaris will create a surface. Here you can adjust how sensitive the surface creation is by adjusting the threshold – do this by dragging the yellow region up and down the histogram. If you have a lot of noise in your image you may need to adjust this higher to avoid creating surfaces over noise or unwanted fluorescence. Zoom in and inspect the surface. Adjust the threshold up and down until you find a point where everything you consider real fluorescence to be covered by the grey surface. If you are having trouble getting the surface to detect everything properly you made need to adjust the settings in the previous step. When you are happy with how the surface looks move on to the final step.

7. In step 4, Imaris will have created the final surfaces over all the objects it has detected. If there are many surfaces it may be displaying them as spots (as below). To view all of the surfaces properly click on the settings taband choose the surface option

8. Lastly, back under the create tab, adjust the yellow region on the number of voxels histogram. You can use this step to remove any small unwanted surfaces that may have been created over noise, or perhaps to remove a very large surface created by backgroud fluorescence or an unwanted cell.

9. You have now created a surface. Use this surface to make measurements, visualise important details or manipulate other channels – see other instructions for help with these steps.
